Installing and Configuring Snort
Basic Snort Configuration
In the pervious post, we looked at Snort: A Network Intrusion Prevention and Detection System.
In this post, we will go through the installation and configuration of Snort. We will be using Ubuntu OS in a Virtual Machine to install Snort.

1. Update your Software Repository
We can update our system repositories by running the following commands
sudo apt-get update && upgrade
2. Install Snort from Terminal
Run the following command to install Sort.
sudo apt-get install snort -y
The flag -y to state "agree or yes" for un-interrupted installation process. We can think of it as a Terms and Condition prompt.
3. Configuring Snort
You will be presented with the following window, asking to enter the range of IP address range that Snort will be listening on to perform IDS/ IPDS.
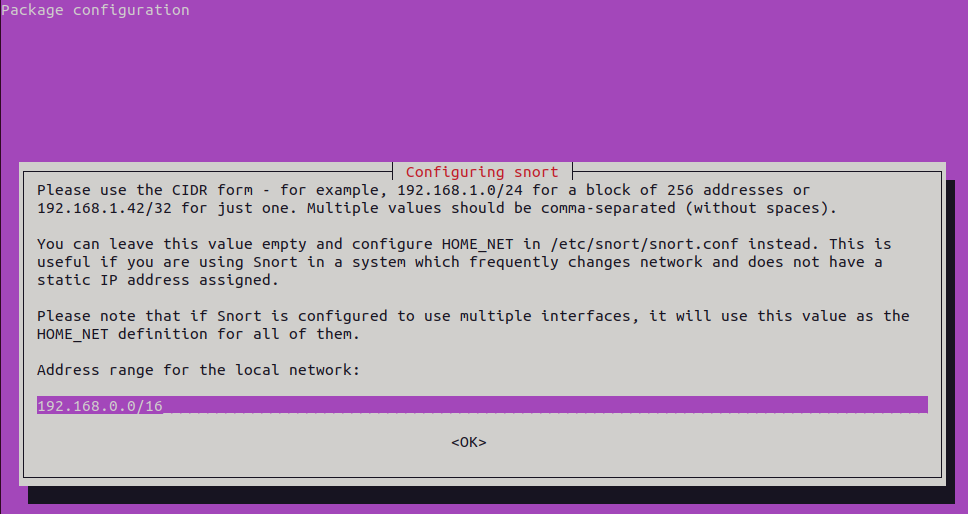
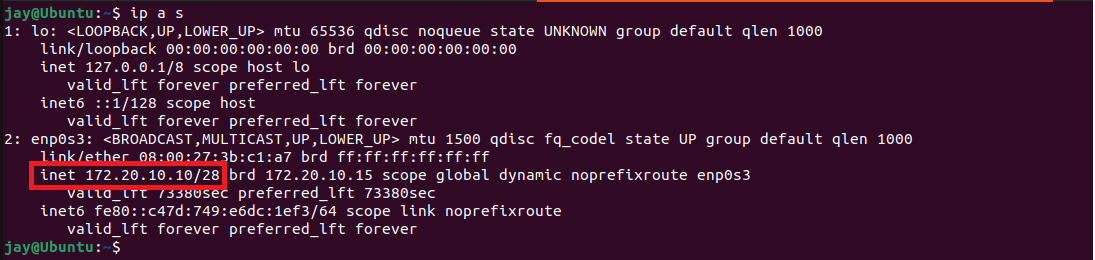
If you are not sure, you can check your IP address by typing ip a s in the terminal, this will provide us with the CIDR (Classless Inter-Domain Routing). The CIDR is a method of assigning IP addresses that improves the efficiency of address distribution.
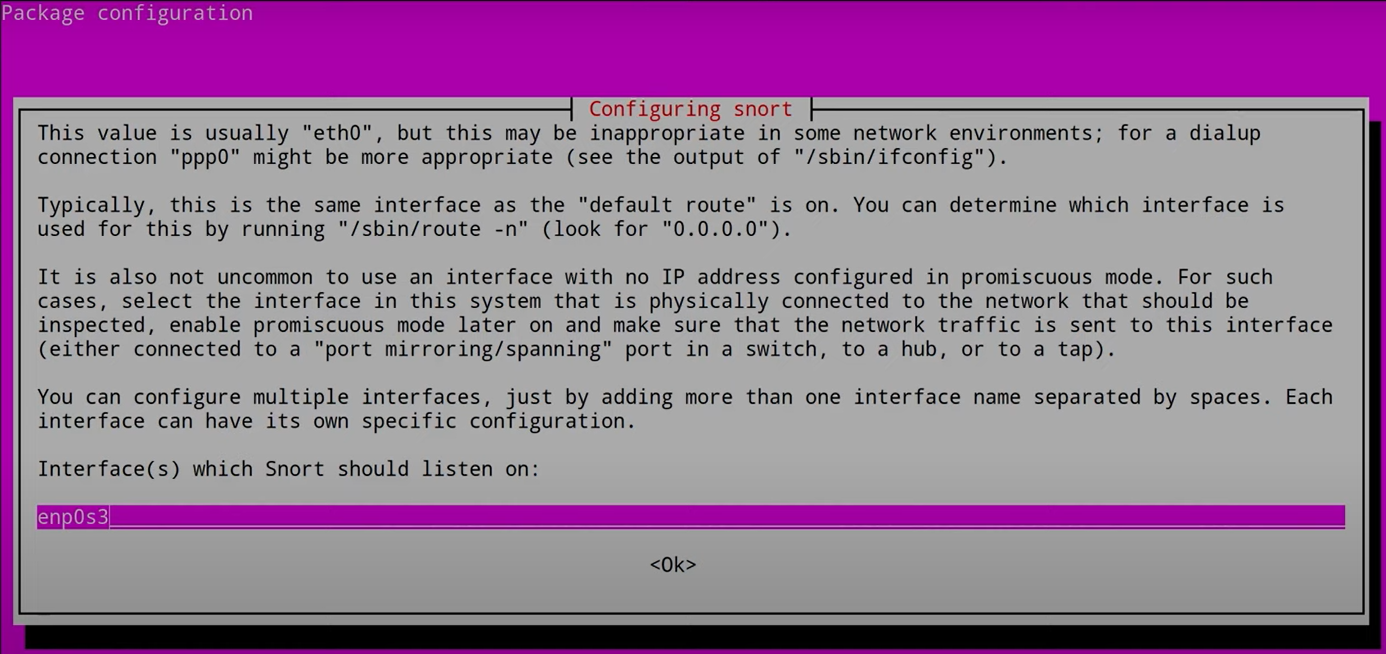
As mentioned earlier, we can decide if want Snort to act as IPS or IDS or run both at the same time. If we were to set up Snort of bare metal server, we would need two (NICs) Network Interface Card to configure as following.
- NIC -1 - Traffic flows from Router
- NIC -2 - Connects to the Switch
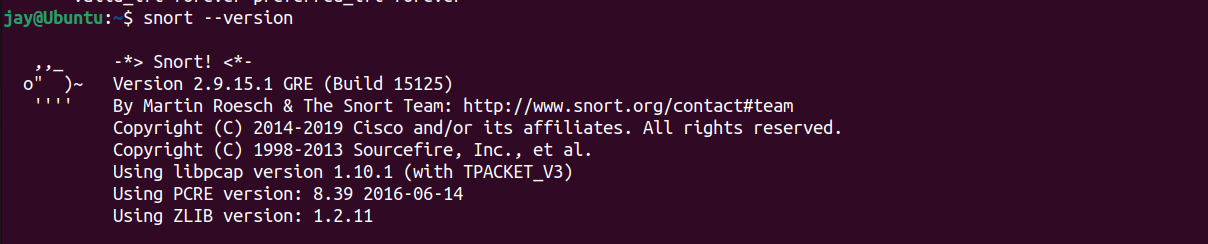
Once the software has been install, we can find out the version of the Snort by using snort --version command
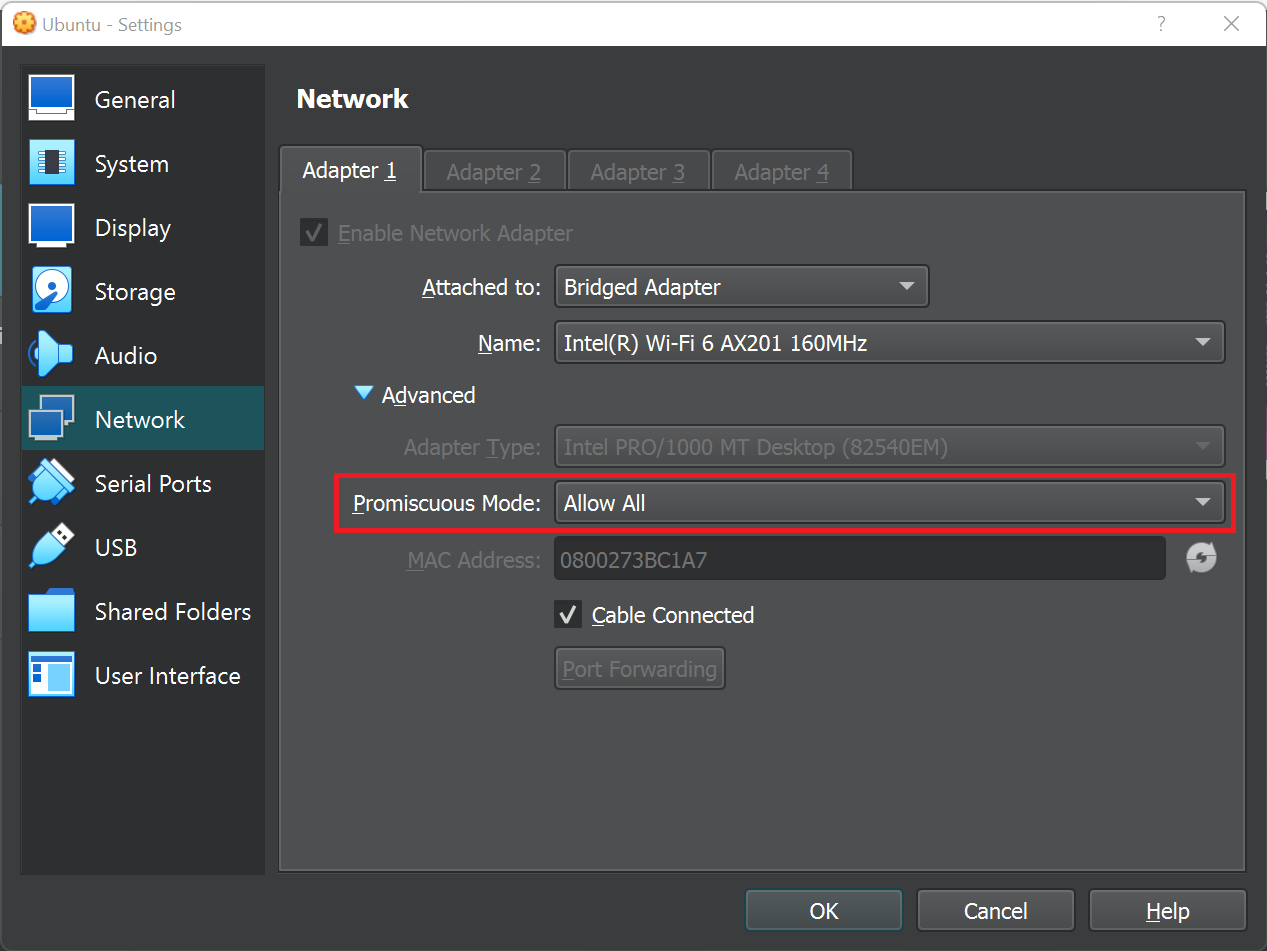
4. Enable Promiscuous mode
The promiscuous mode makes it possible for a physical network adapter to have multiple MAC addresses, allowing all incoming traffic to pass the physical network adapter of the host machine and reach the virtual network adapter of the VM which has its own MAC address that is represented on the host adapter.
If we are running this on bare metal hardware, we would have to set-up this on terminal. We have to follow the following syntax command.
sudo ip link set [Name of netword card] promisc on
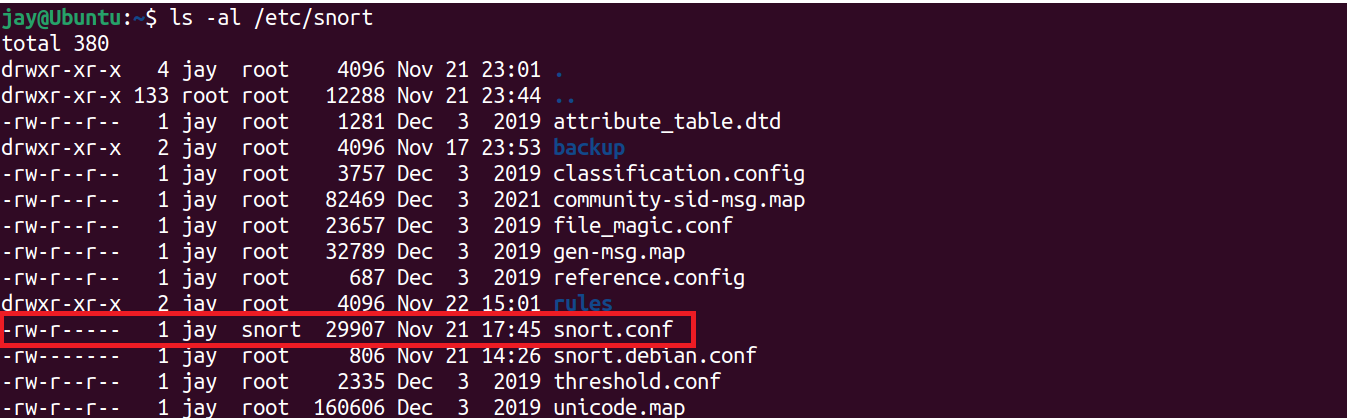
5. Configurating Snort
The configuration file is located on /etc/snort file direcotry. As we can see the file snort.conf which we will be using to configure and set rules based on our requirements.
snort.conf file. If we make any mistakes we can always come back to this file and see the differences. Open the snort.conf file from Vim Editor. If you don't have vim installed on your machine, we can get it installed by following command.
sudo apt-get update && upgrade
sudo apt-get install vimOnce the Vim Editor is installed, enter the following command to view the content of snort.conf file.
vim /etc/snort/snort.conf
sudo chown -R [user] /etc/snort/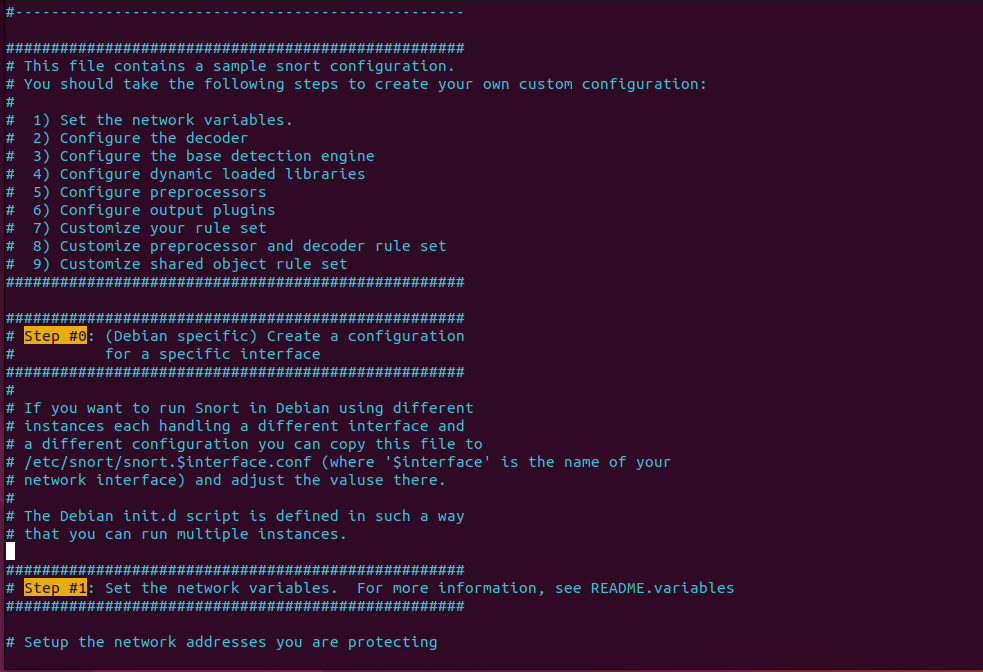
This document walks though all the settings, and configuration. It is important to understand how this is set-up and how we can modify the settings.

For Home_Net we state the IP address of our network that we wanted to monitor by Snort, this can be our network path as we stated at beginning of the set-up.
ipvar HOME_NET 172.20.10.0/28
We state host as 0 so we can scan the whole network whithin that Octet. Find more info about Network, Subnet & CIDR.
For External_NET we leave it as deafult, which is "any" as this defined where we will get attackers from and whom will attack us.
ipvar EXTERNAL_NET any
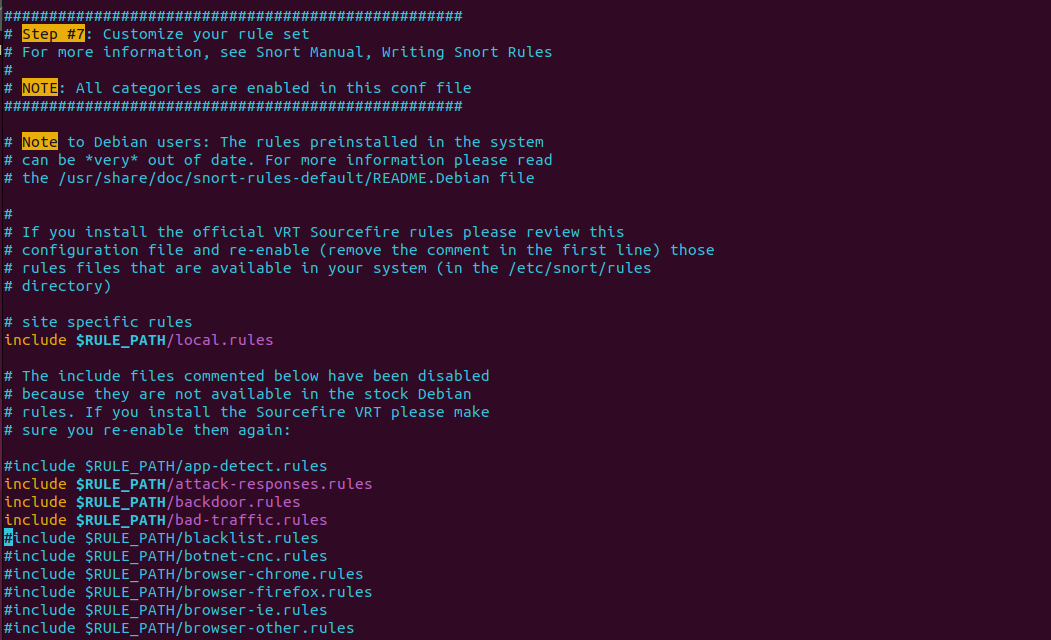
As we scroll down, we can see the Step#7 this denote what rules are stored. Our own rules are located on the include $RULE_PATH/local.rules which is empty. We can write our own rules, and let the Snort filter the traffic. All the rules are separated for easier management, such as Community Rules, Subscribes Rules and more.
As we can see certain rules are not used which are commented using #symbol next to the rule as shown below.
Once we have made the changes, we can write and exit from snort.conf file and test the application to see if we have configured it correctly, we will run the following command.
sudo snort -T -i enp3s0 -c /etc/snort/snort.conf
We have to access snort through sudo, as we are accessing network traffic, then we state the snort then we specify the interface (NIC) -i enp3s0 we will be using to monitor the traffic from, and finally state the configuration -c file path /etc/snort/snort.conf

-T flag on snort application.Once we have entered the command to check for syntax error and validation of input we have to check it with -t flag. It would check the list of configured rules, and provide us suggestions to resolve the issues. (The following screenshot shows results)
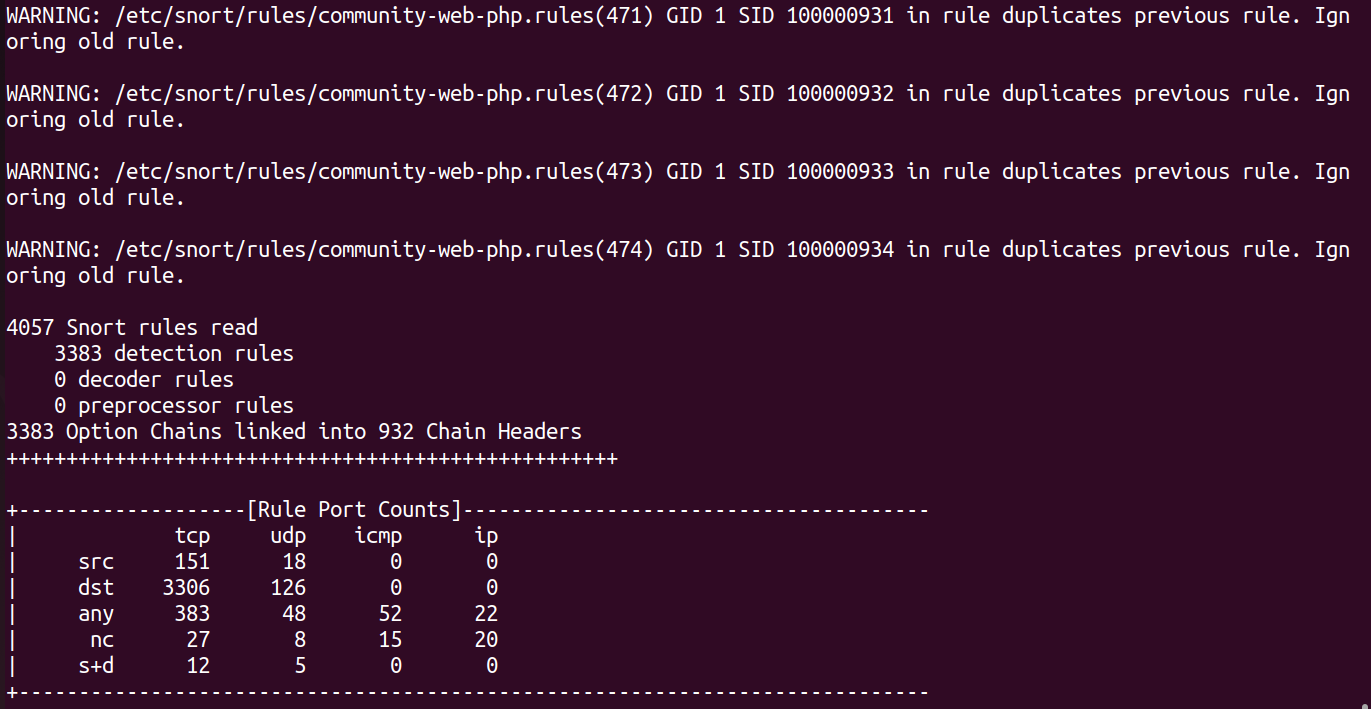
As we can see, test command has given us warning on duplicate rules, and also It has given up how many Snort rules are read, and how many of them fall into different categories under Rule Port Counts.
We will be removing the rules that are created by Snort community, to use our own local.rules that we specified earlier using Vim Editor.
Editing Vim Configuration File (Optional)
To make ourlife easier, we will be using Vim Editor, with numbered lines and syntax on.
- Open vim configuration file by typing the following command:
sudo vim ~/.vimrc - Enter the command as shown below using
ito insert command.
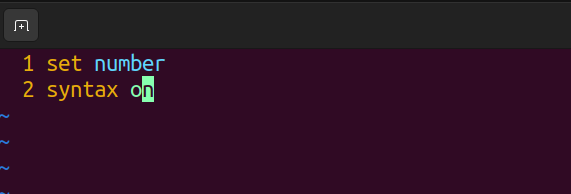
3. Press the Esc key, to save the config file, type :w and hit Entre key
4. From now on any document we open in Vim Editor will have number for each line and syntax on.
Now we have lines on editor, which will helps us to comment out Snort Community rules. First we need to open the file on Vim, then find out which line does the community rule starts and end as shown in the image below.


Using the numbers on line, we can tell Vim to commend out the lines between 597 to 717s using this command :597,717s/^/#
This key # will comment out the rule, resulting is disabling the rules, which we can added later, when required.
:597,717/^#// Now we can re-run the test for snort for any syntax error or warnings.
sudo snort -T -i enp3s0 -c /etc/snort/snort.conf
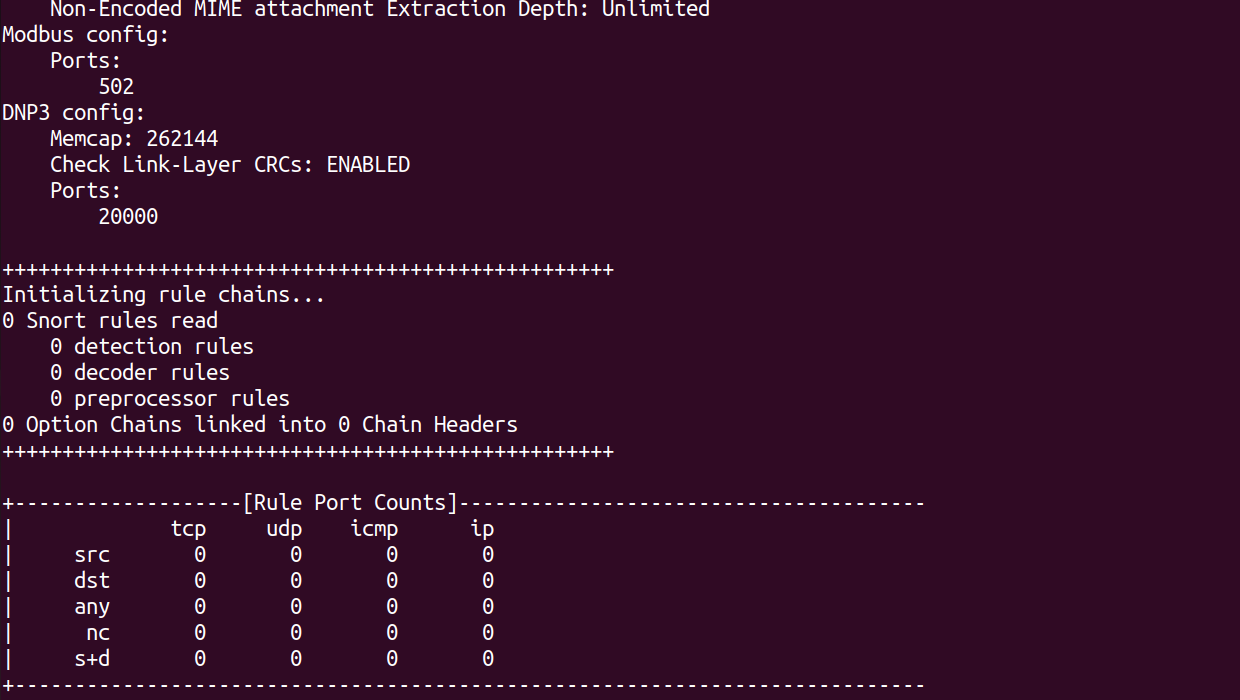
We can see there are no rules read from the community, after running the self-test on Snort with the /etc/snort/snort.conf file. Because, we currently don't have any rules within out /local.rules
6. Writing Snort Rules
We have installed and performed initial set-up on Snort, we also have disabled predefined rules that are created by Snort Community, so that we can write our own rules and understand how does Network Intrusion Detection and Prevention System (NIDPS) works. We will be using SNORPY to help us create Snort Rules, It's a web based application to easily build rules.
- Open
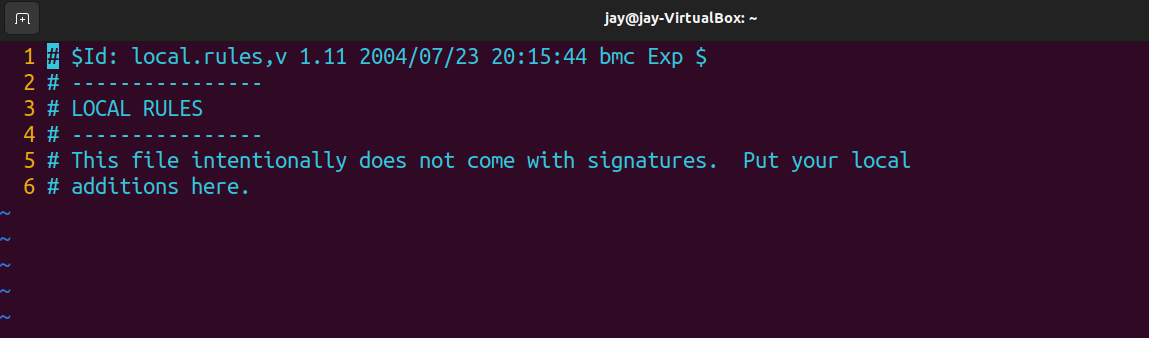
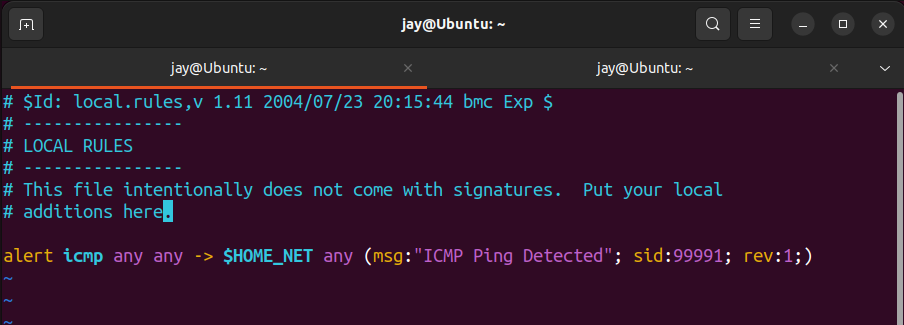
local.rulesfile by enter the following command:
sudo vim /etc/snort/rules/local.rules
We will be presented with the following screen, currently no rules written to it.
2. Go to Snorpy website, and fill in the filed as shown below
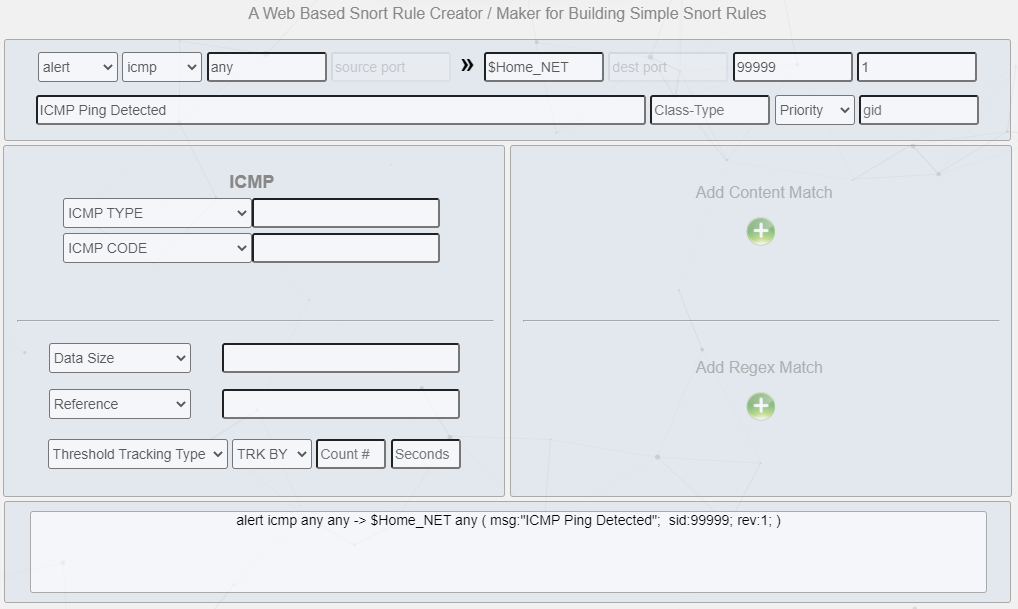
As we can see the rules are generated at bottom windows as we fill the required field. Copy the rules at the bottom and pasted in the /local.rules editor as shown below.
Looking at the rule, we can understand what each line does, based on Snorpy GUI Creator, however we will go through it in details below.
alert- We are using snort for IDS, therefore we need to be alerted
2. icmp - Defining the protocol, in this case icmp for ping connection
3. any any - Stating we need to monitor from any network and any port
4. $HOME_NET - Variable that defined our home network, we've set earlier (192.168.56.1/24)
5. any - Check for any incoming ports from attackers
6. msg:"msg" - Message that we want to be view, when alert triggered.
7. sid:0000 - State signature ID, that doesn't conflicts with previous SID.
8. rev:1 - Simply state the revision of the rule
Once rules is entered, press :wq to write and quite the file.
7. Running Snort
Now we have configured and given the rules for Snort, we can run the program.
sudo snort -q -l /var/log/snort -i enp0s3 -A console -c /etc/snort/snort.conf
This command is described in details below
-q Run in quiet mode
-l Store the log files in directory /var/log/snort
-i Use this network interface enp0s3
-A Alert mode print results to console -A console
-c Use the rules located in this file /etc/snort/snort.conf
Once we have ran this command, it should not show anything on the screen, as we are running on -q quite mode. This indicate that Snort is listening for any traffics using the rules provided.
In order to test the IDS to replicate practical scenario, we have to run the following Virtual Machine.
- Ubuntu - Where we have set up the Snort
- Kali - Hacker machine
- Metasploit 2 - Target machine. This VM used to perform penetration testing and security research purposes which has vulnerable designed for testing.
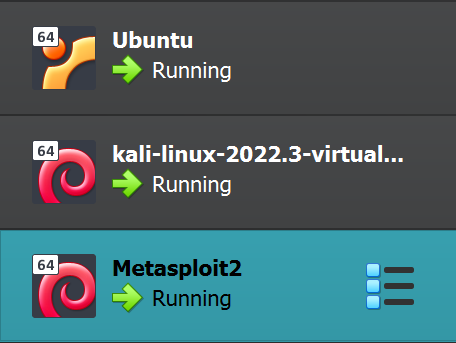
Once we have all the VM running, we have to make sure they all are on the same network as shown below. Expect Ubuntu, where we have set Promiscuous mode to capture all the traffics flowing through the network.

Now we have configured the network settings on all our VM machine, we can now ping our Target machine (Metasploit 2) from Attacker machine (Kali).
ifconfig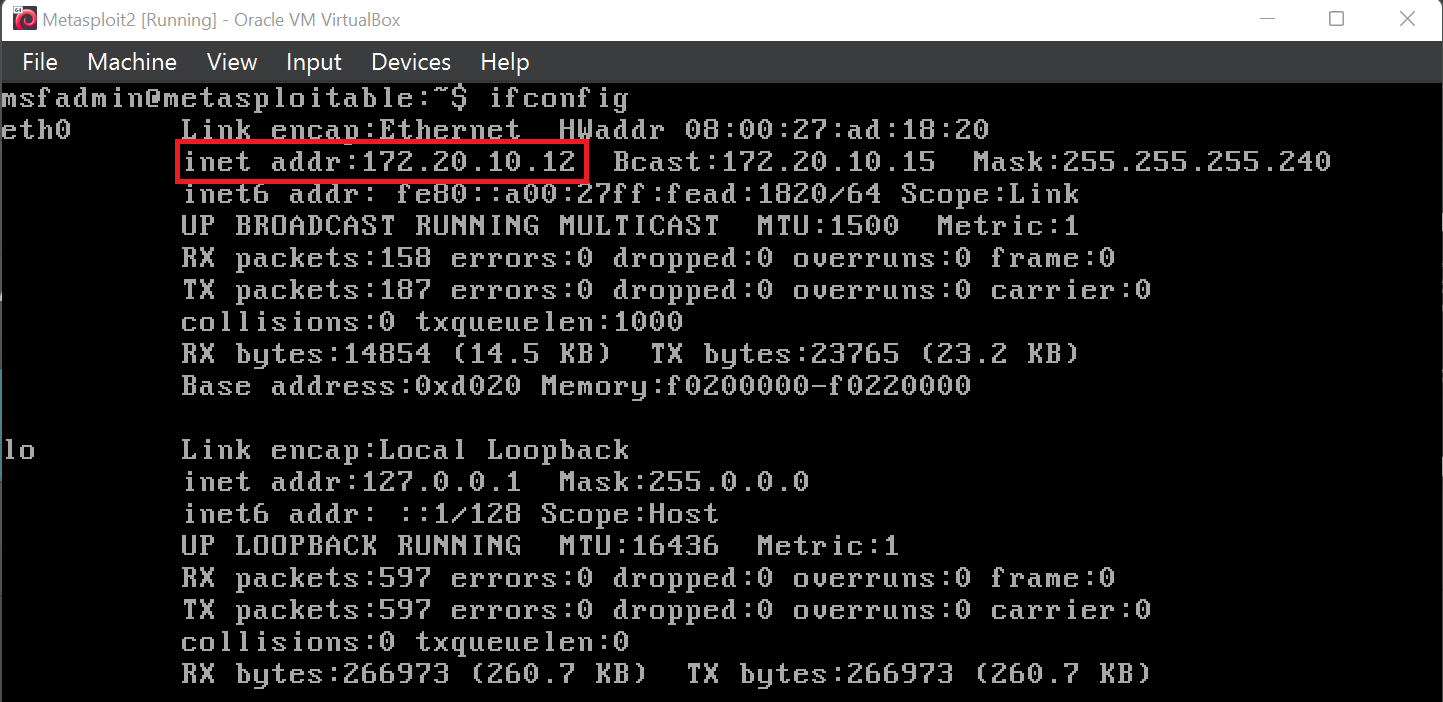
Once we have Snort listening on our Ubuntu VM, we can ping our target machine Metasploit 2 from Kali.
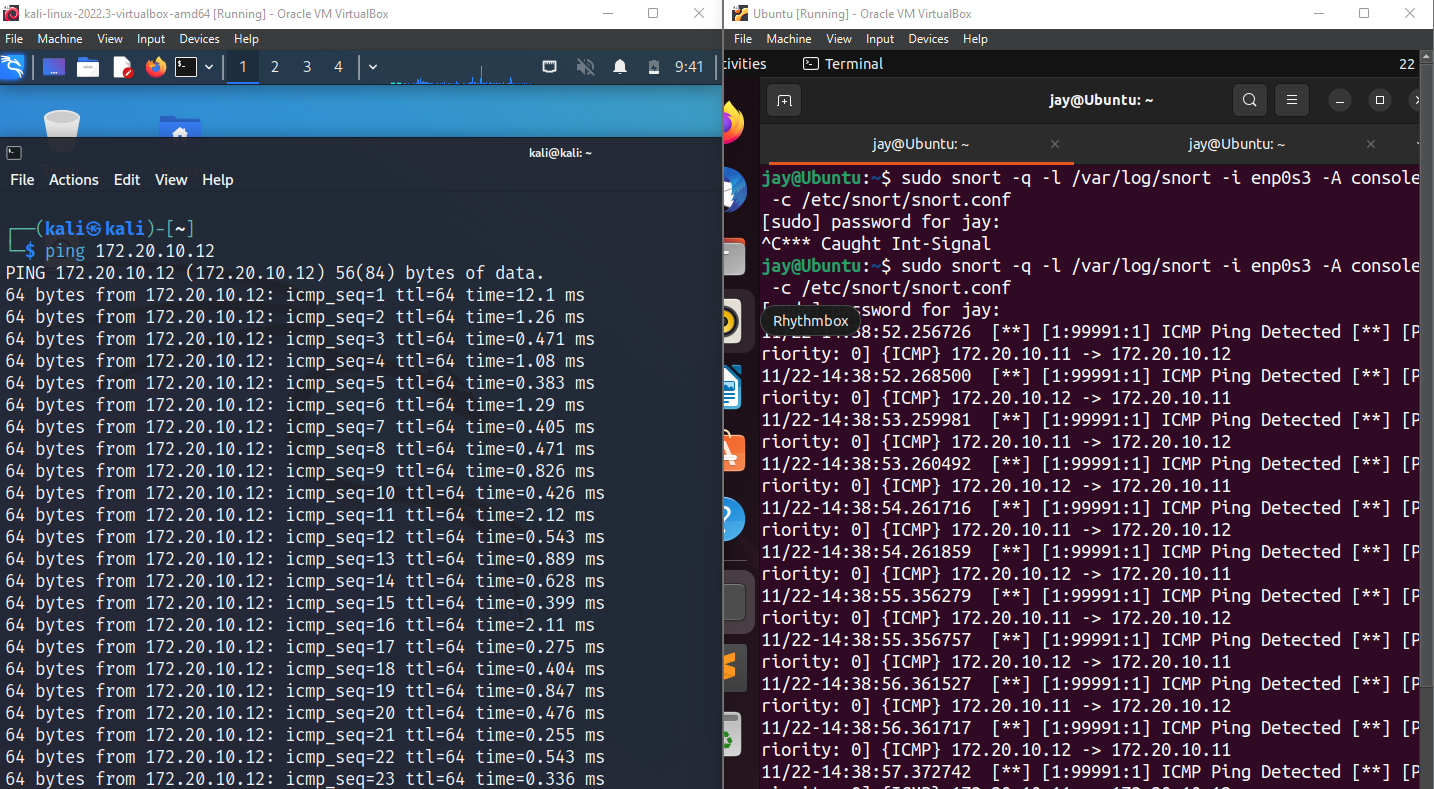
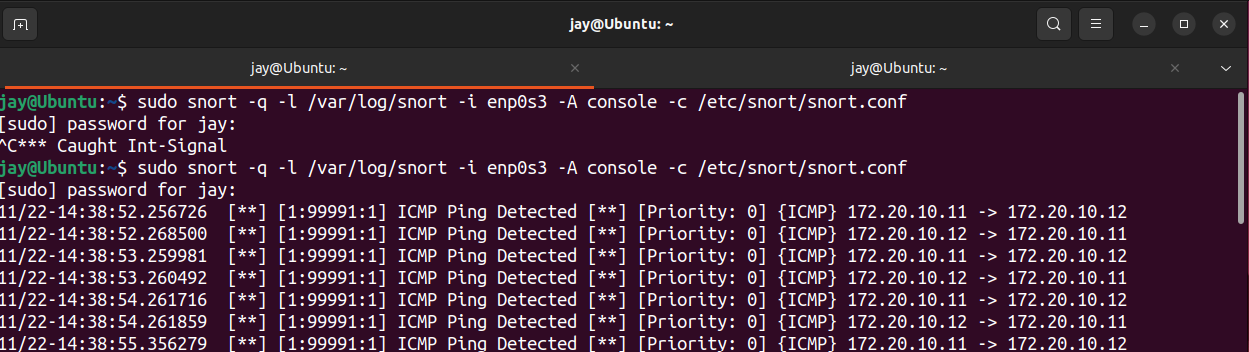
As we can see the alerts we have created triggered with our specified details on custom Rules.
This is a great example of simple network activity used by cooperate network pre-build into their IDS/IPS. If the rules has been crafted for every possible intrusion attacks, companies can easily monitor the network and block unwanted traffic at Firewall/Router before it gets to company network.
Here's another rule to detect SSH log in attempt on default port 22. This is one of the reason IT Engineers harden their security by changing their default ports to avoid any bots trying to connect.


On next article, we will be learning how to make use of these logs from Snort and import them into Big data for report and visualise them in Dashboard. We have only looked at couple of rules that are triggered by our custom rules, for demonstration.
In big cooperate network, we would have thousands of logs created in a short period of time, based on rules implemented.
Member discussion