Installing and Configuring Proxmox
In this article, we will be walking through the process of installing Proxmox Hypervisor.
What is Proxmox ?
Proxmox VE is an open-source enterprise hypervisor, that can manage clusters of nodes, hosts and containers. It has a built-in web interface to easily manage virtual machines (VM), software defined storage and networking traffics.
We can spin up any operating system (OS) for various services. For instance, we could create our own router with NIC PCI passthrough for optimum speed, that gives direct access to our VM node. Same principle applies to any peripherals connected to our server.
Before we dive into the installation process of Proxmox, we will briefly touch on hypervisors, and their features.
Types of Hypervisors
There are 2 types of hypervisors.

Type 1 Hypervisor
Installed on a bare metal hardware, dedicated to be used for virtualisation. Type 1 Hypervisor take full advantage of it’s resources. e.g. VMware EXSi, can have multiple instance for various servers, such as Database Server, Mail server, Back up .etc
The most common Hypervisor used in enterprise data centres are:
- VMware ESXI
- Citrix Xen Server
- Microsoft Hyper-V
Type 2 Hypervisor
Runs on existing operating system, such as Microsoft Windows, Mac OS, Linux, Unix. etc. To give an example we run VirtualBox Manager on top of Windows. An operating system sits between hardware and the hypervisor, which means everything is passthrough the OS.
This could be used on personal computers and for testing of new software and OS. The most common Hypervisors are:
- Oracle VM Virtual Box
- VMWare Player
- VMware Workstation
Using the hypervisor allows us to take advantage of all the hardware resources, which means we can decide how much memory, storage, and CPU is assigned to certain VMs. Each VM is isolated, therefore there will be no access to resources from one VM to the other.
Now that we have a broader understanding of the differences between the two hypervisors, let's get to the installation process.
We need a laptop or server that support following features
- CPU: AMD / Intel CPU with 64 bit with Virtualisation Support. Find If your machine support Virtualisation here
- RAM: 4GB of Ram, more is recommended to run multiple VMs.
- Network Card: At least 2 NICs, one for console management, and another for VM allocation. If you have only one network card, you can purchase 2nd hand cheap PCI card from eBay.
- USB Drive : 4Gb of pen drive to make bootable Proxmox
- USB Imager : Rufus or Etcher Software to create bootable drive.
- Hypervisor : Proxmox ISO - download here
Installation of Proxmox - Open Source Virtualisation Hypervisor
- Download official Proxmox VE iso
- Create a Bootable USB using Rufus or Etcher
If you get a prompt, stating ISO/File is not compatible and DD image writing mode is forced - Click on Ok

3. Once iso is flashed, connect to PC / Server then boot into it USB through Bios
All the vendors have different keys key to access BIOS
4. Follow the GUI installation process
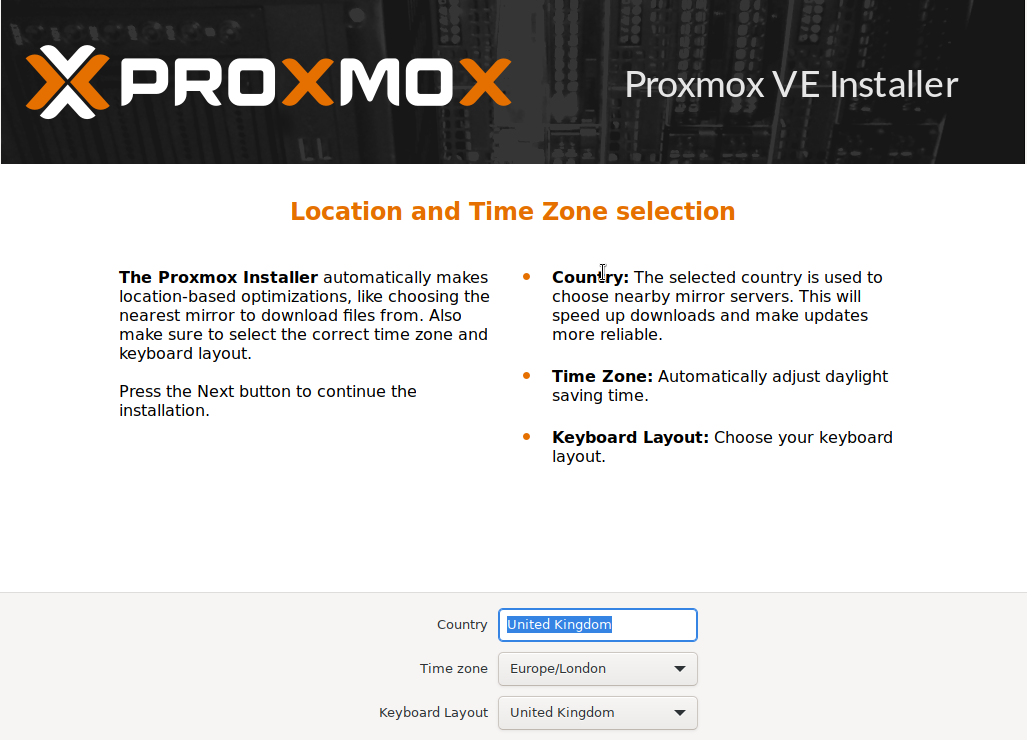
You will be presented with End User License Agreement screen once booted into ISO. Click on Agree, then choose the disk you want Proxmox to be installed on, along with File type.

Fill in the password and enter your e-mail. This would be useful for Proxmox to notify of any alerts and issues on the system. e.g. low disk space, back up failure and more.
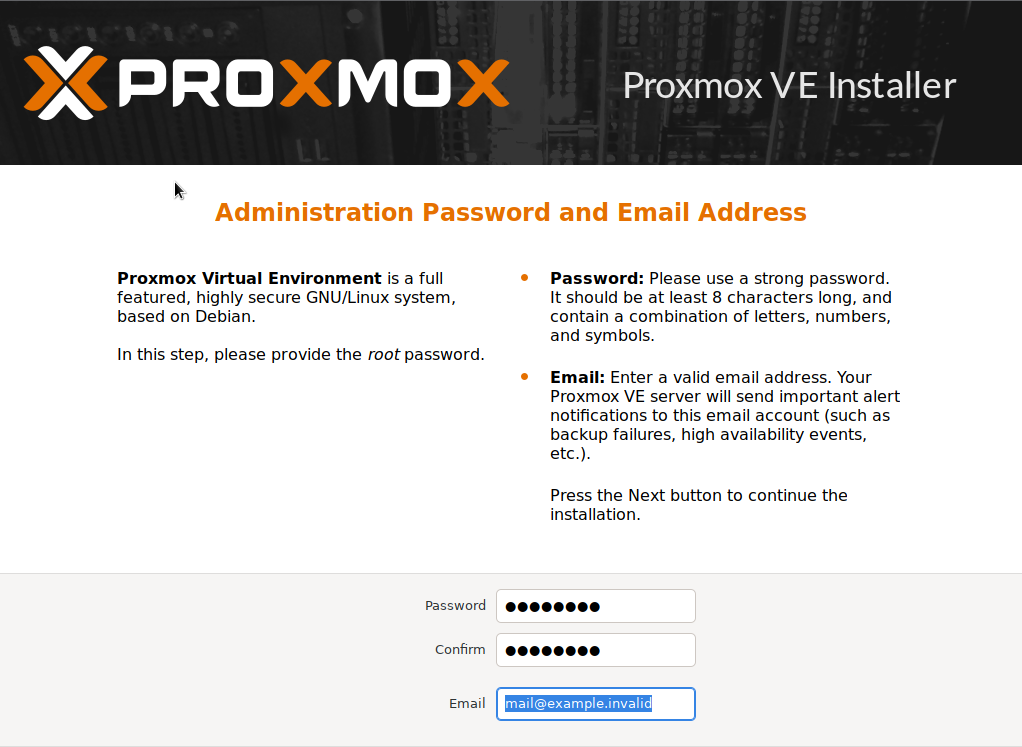
Fill in the password and enter your e-mail address. This would be useful for Proxmox to notify of any alerts and issues on the system, e.g. low disk space, back up failure and more.
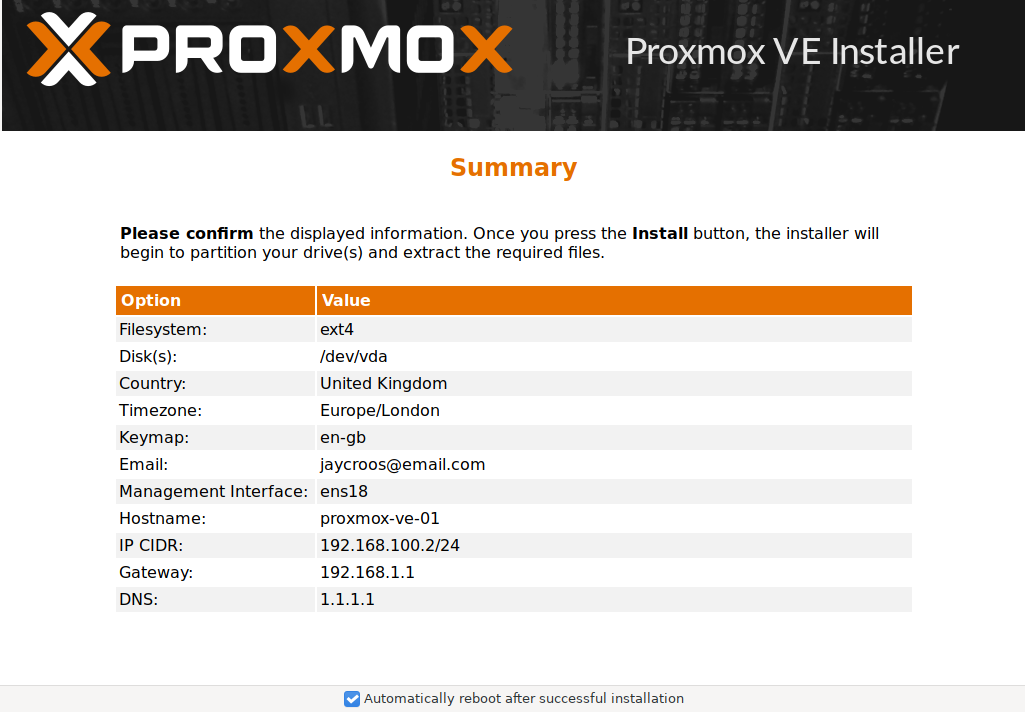
Management interface : Determine what interface port will be used to manage Proxmox to access GUI.
Hostname: Once Proxmox serveris named,it will be reflected on the Web GUI, this also helps us to identify the server.
You may want to name it proxmox_ve_1 or any name that is suitable and easy to identify.
IP Address: This will be used to manage the server, it could be left as default.
Gateway: This is also assigned automatically, we can also leave it as default.
DNS: We don't have any internal DNS Server configured, like Pi Hole . A public DNS server from Cloudflare can be given (1.1.1.1).

A summery of configuration will be presented once all information are completed. Then click on install. Installation process will take 5-10 minutes.
After the reboot, you will be presented with CLI welcome screen stating your IP Address to login. By default, your IP Address will be https://<IP-Address>:8006, from here we can access Proxmox web GUI.
Majority of the settings are carried out on Proxmox Web GUI, but If we were to change any settings, and diagnose any issues, we can do it through CLI.
The default username is root and the password is whatever we've set during the set-up process.

Once you entered the Ip address https://192.168.100.2:8006into browser, you will be presented with warning sign as this will have self assigned certificate. This is expected as we just installed the service. Click on proceed to access.
Login screen will be presented as shown below, entre the credentials to access the Proxmox Hypervisor


There are tons of options available on this hypervisor, with logs, system summary, command prompt and more! In future, we will be installing and configuring Unix system, and also creating number of VMs and dockers for DNS Server, Reverse Proxy, Open VPN and more.
Securing Proxmox with 2FA
Securing your Hypervisor
Now that we have a hypervisor set-up,It would be a great idea to apply additional layer of security using Two Factor Authentication (2FA). Choose TFA option from your account drop down list.


There are number of options within TFA.
Click on Add > TOTP
Choose TFA option from your account drop down list. Time-based One-Time Password (TOTP) is a computer algorithm that generates a one time password (OTP) that uses the current time as a source of uniqueness.
TOTP will prompt with auto generated QR code, which you can scan using TFA Apps on your phone, like Microsoft Authenticator or Google Authenticator.
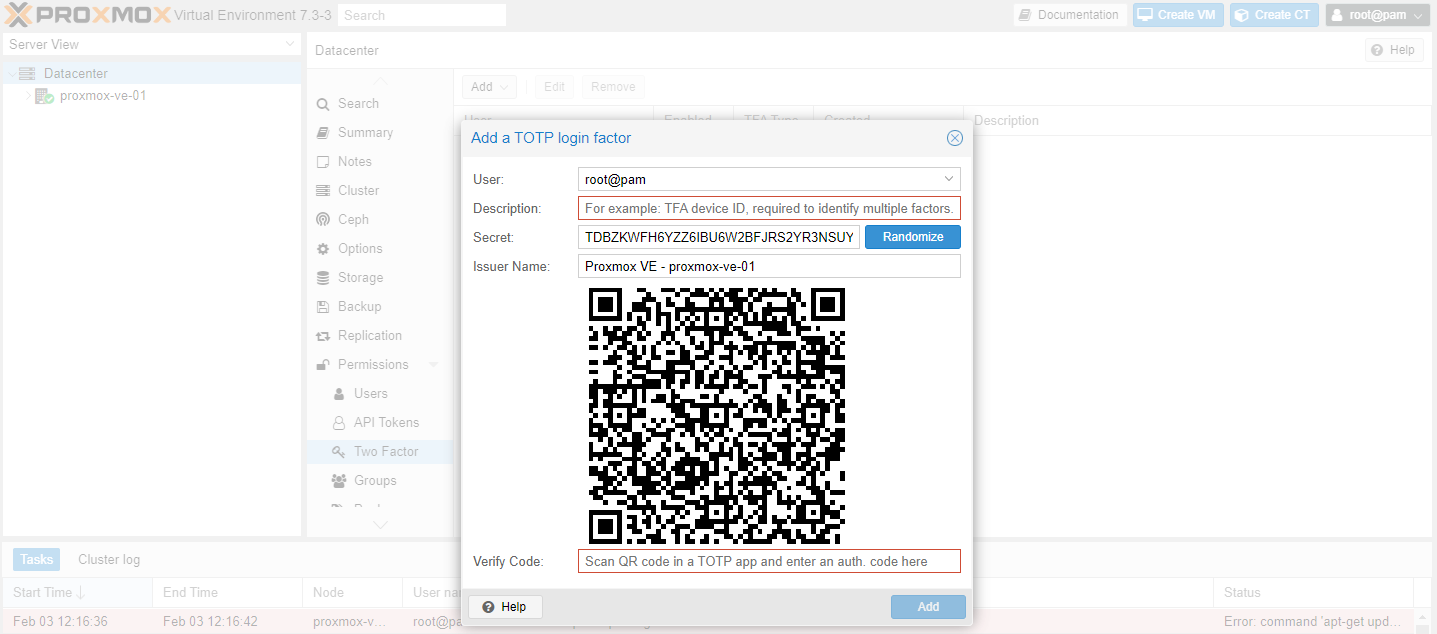
Give the description of server, e.g. home server, then open your favourite authenticator app to scan the QR code provide. Once the code has been added to the App, it would provide you with 6 digits, which changes approximately every minute.
Entre the code shown in verify code field to complete the 2FA set-up.
When the server is facing public domain through VPN, It is recommend to use TFA to apply additional layer of security, as it would prevent hackers and malicious attacks.
Member discussion